
If you are using an on-premis version of iManage you will need to follow these steps to connect
⚠️ If you are using iManage On-premis (10.0 or above) you must either have a public facing URL, or you may choose to configure an Application Proxy service. If choose to use Azure please follow this guide.
Further, if you do have a public facing URL, you may have implemented IP whitelisting. If this is the case, please reach out to syncly to request our public IP address.
Step 1 - Adding the Application in iManage Control Center
- Download the Syncly extension file relevant to your iManage infrastructure
- Log into your iManage server
- Navigate to the Control Center
- Navigate to Settings -> Applications on the lefthand navigation bar
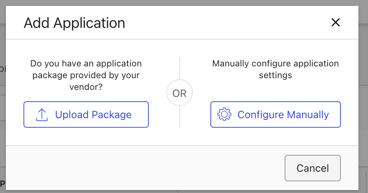
- Click "Add Application"
- Select "Upload Package" and select the file you just downloaded
- Click "authentication" to move to the next screen
- Update the redirect url to your new Syncly Server address (Provided to you by Syncly) e.g https://lawfirmABC.syncly.io/api/connectors/authorised (where lawfirmABC will be unique to you)
- Generate a new client secret key
- Enable "Allow refresh token"
- Accept all other defaults (your screen should look similar to the one below)
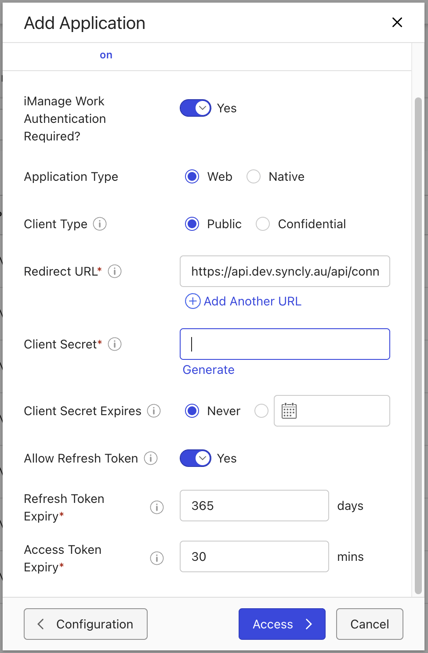
- Click "access" to continue to the next screen
- Access - This step relates to who will be able to Authenticate the iManage Connector within the Syncly WebApp
- Settings
- Enter the Syncly host which was given to you by Syncly e.g lawfirm.syncly.io
- Enter the URL for your iManage server
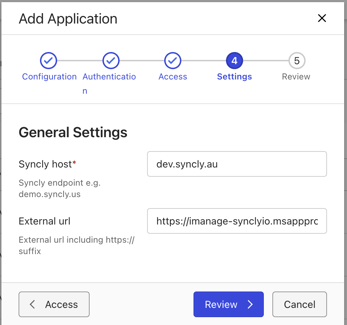
- Click review, ensure "Enable Application" is ticked
- Select Finish and you are done
Note: If you wish to remove the Syncly plugin from the manage contextual menu, simply do this via the Context Menus settings following this guide: Syncly iManage Plugin Installation
Step 2 - Add the iManage Connector in Syncly
- Open a new tab or window in your browser and navigate to your instance of Syncly
- Navigate to the "Connectors" module on the left hand bar
- On the far right, you should see an option for "Available Connectors". If you do not see this section, it may be because you have not been given the "Connector Admin" role within your IdP (See here for more help on this)

- Click the ➕ button next to the iManage Connector (note, this is different to the iManage Cloud connector)
- You will be presented with some options that need to be filled in:
- Name - Enter any name you like here, it has no bearing other than to help you identify which instance this connector points to. e.g iManage Sandbox OR iManage US etc
- Client Id - This is a sting of characters that iManage generated randomly for you and can be found listed in the record of the application you added in step 1.
- Secret Key - Do not share this with anybody, this will have also been generated for you when you registered the Syncly App in the previous step. Simply copy and paste the value
- Scope - Enter "User"
- Refresh Token - Leave as the default
- Server Address - Enter the URL for your instance of iManage.

- Click "Save only" or "Authorise" if you wish to save any immediately proceed to providing your connector with a username to authenticate as.
Note: Once a connector is added, it is made available for all other users to see in their list. Importantly, every individual user must run through the authorisation process the first time they log in before they can use it in a Workflow
To understand the Authorisation process, please refer to the user guide here