
There are two steps to adding your SharePoint Connector into Syncly
💡 Tip: In order to make these changes you will need to have access to an account with the "Sharepoint admin" Role
Step 1 - Adding an Application in SharePoint Admin
- Navigate to your Microsoft Entra Admin Centre
- Add the redirect uri as the following https://<company_syncly_url>/api/connectors/authorised

- Create and note the application secret

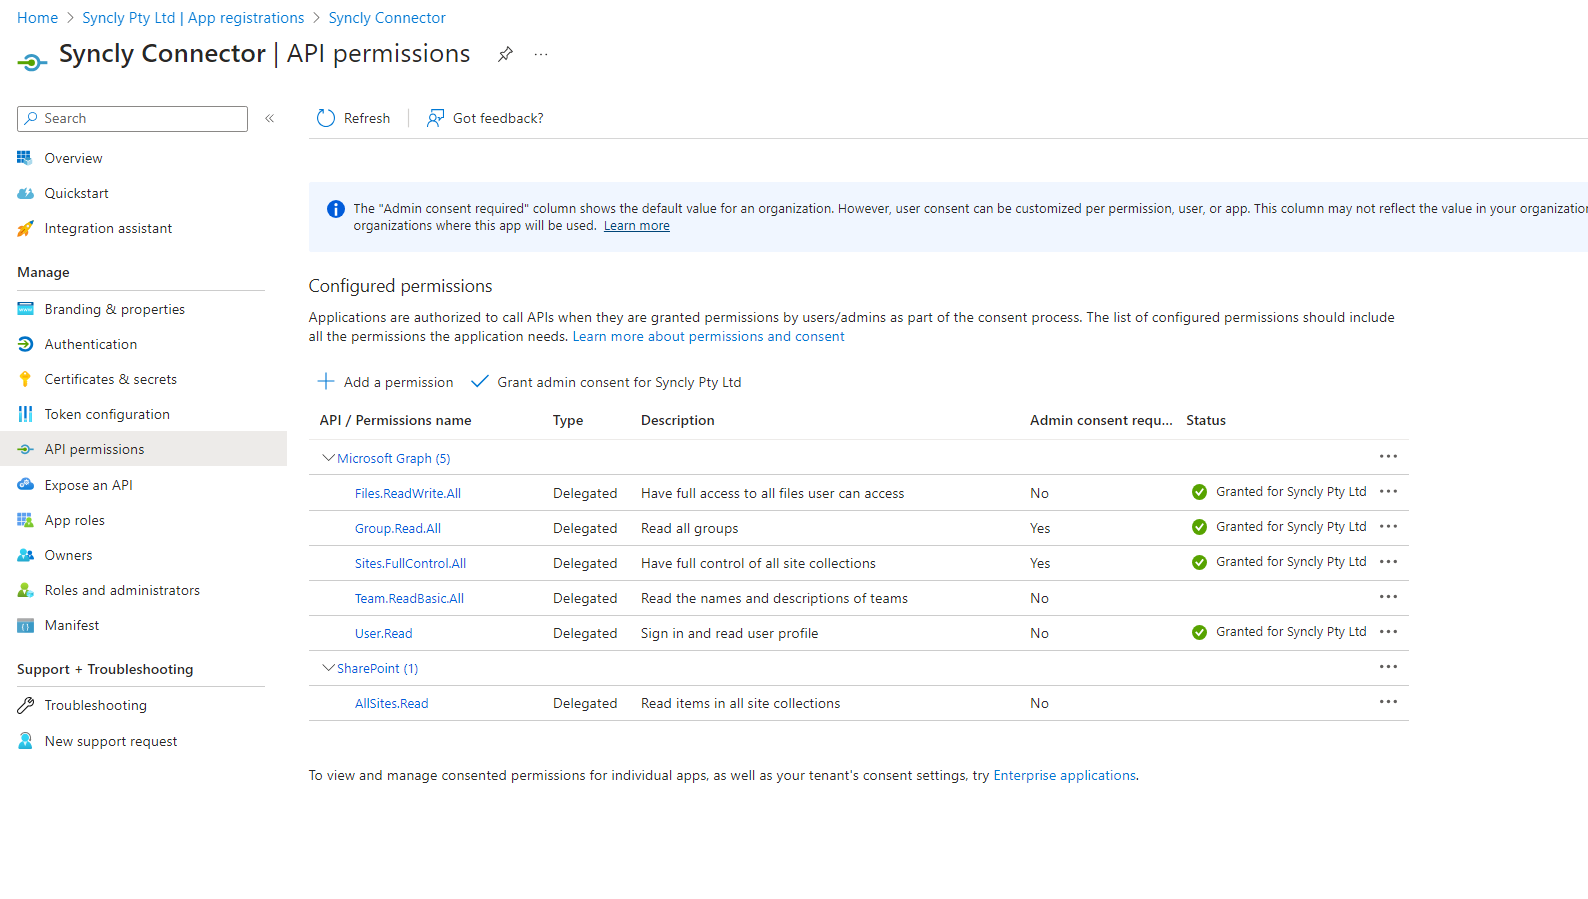
- The following application permissions must be set - note these are delegated permissions and therefore require a user token.
- Please ensure you have selected "Grant admin consent for your organisation"
Step 2 - Adding your SharePoint Connector in Syncly
- Open a new tab or window in your browser and navigate to your instance of Syncly
- Navigate to the "Connectors" module on the left hand bar
- On the far right, you should see an option for "Available Connectors". If you do not see this section, it may be because you have not been given the "Connector Admin" role within your IdP (See here for more help on this)

- Click the ➕ button next to the SharePoint Connector
- You will be presented with some options that need to be filled in:
- Name - Enter any name you like here, it has no bearing other than to help you identify which instance this connector points to. e.g SharePoint Sandbox OR SharePoint Online etc
- Client Id - This is a sting of characters that SharePoint generated randomly for you and can be found listed in the record of the application you added in step 1.
- Secret Key - This will have also been generated for you when you created the Syncly App in the previous step. Simply copy and paste the value
- Scope - Enter "https://graph.microsoft.com/.default"
- Refresh Token - Leave as the default
- Tennant ID - Enter the unique string h characters assigned to the Syncly app when you completed step 1.

- Click "Save only" or "Authorise" if you wish to save any immediately proceed to providing your connector with a username to authenticate as.
Note: Once a connector is added, it is made available for all other users to see in their list. Importantly, every individual user must run through the authorisation process the first time they log in before they can use it in a Workflow
To understand the Authorisation process, please refer to the user guide here