
In order for the Syncly WebApp to authenticate users, you must setup your identity provider (IdP) with the following
In order to control access to the Syncly web app we support various federation providers, this page outlines how to do this via Azure although we support any IdP that works with the OpenId Connect standard.
In each case the IdP will need to set the redirect uri to the server picked when setting up the web app. The four roles 'User', 'System.Admin', 'Admin' and 'PluginUser' need to added into the provider and users assigned to them (For more information about roles please read this) . Note that we also have the ability to map group claims to roles via application configuration.
- Create an application registration in Azure; and
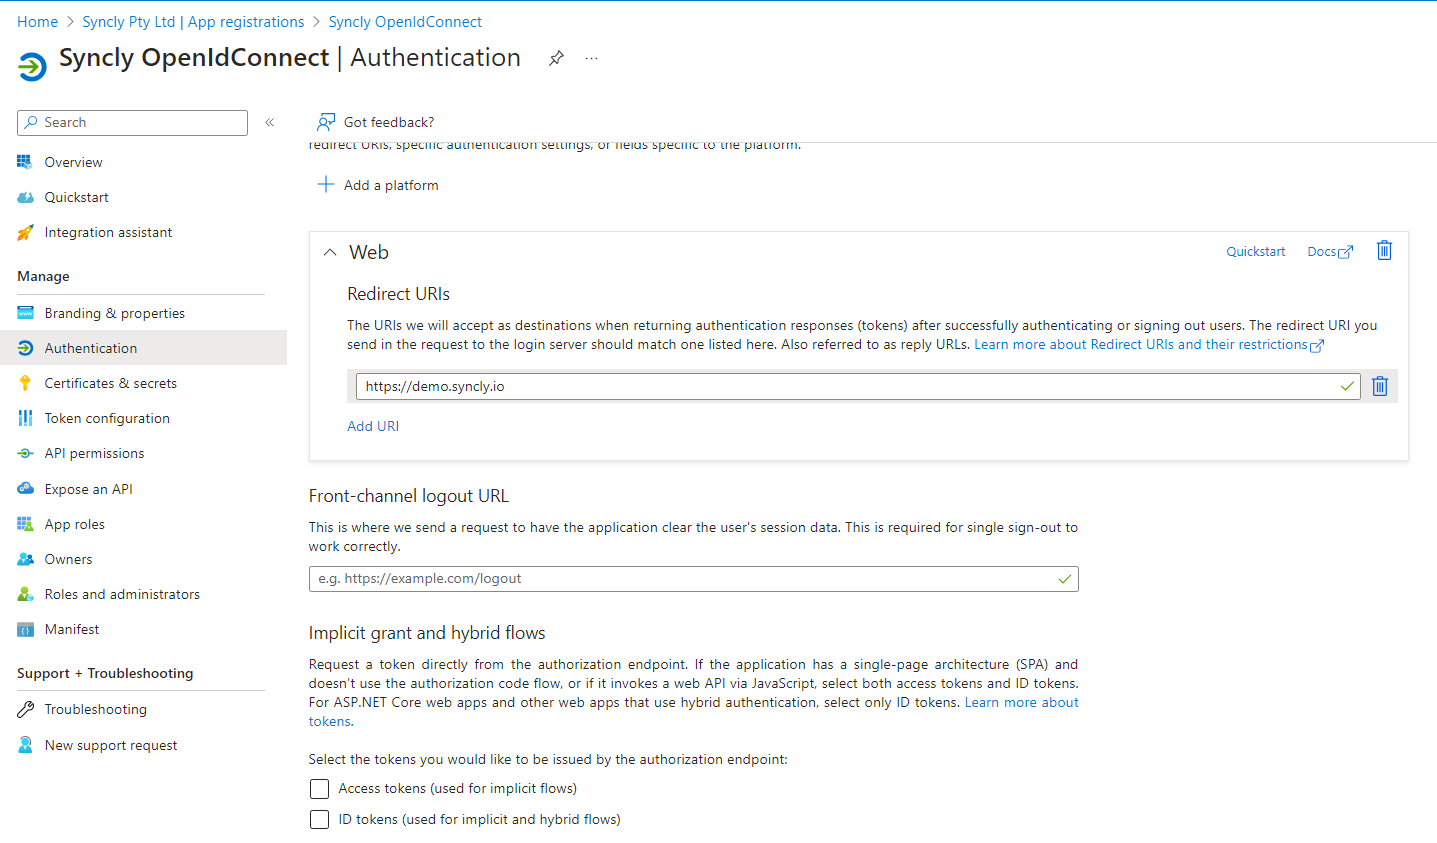
- Assign the redirect URI provided to you. This will be in the format of https://company_name.syncly.io/signin-oidc
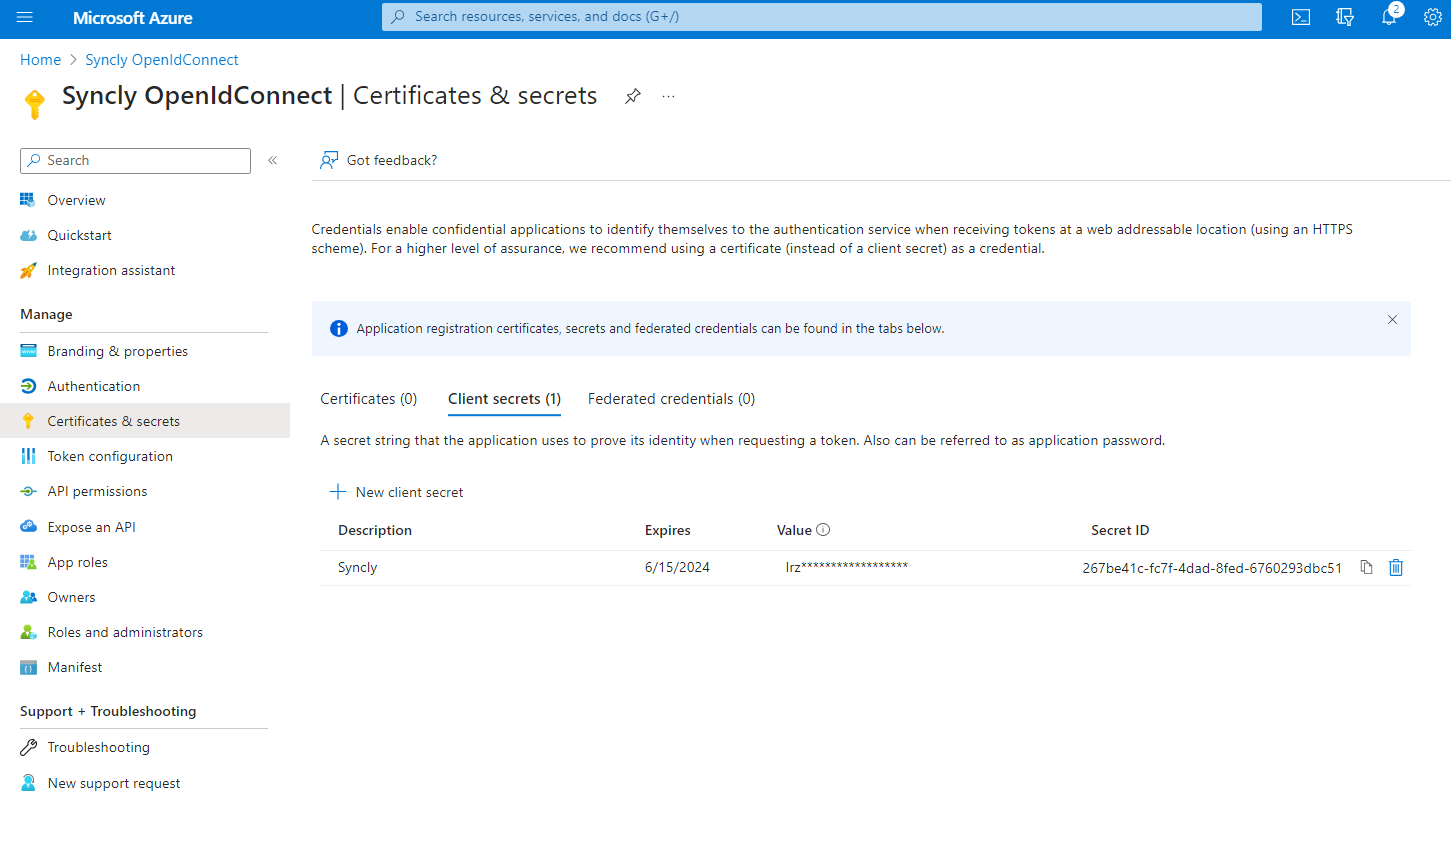
- Add a secret key (be careful to copy it immediately, only available after created)
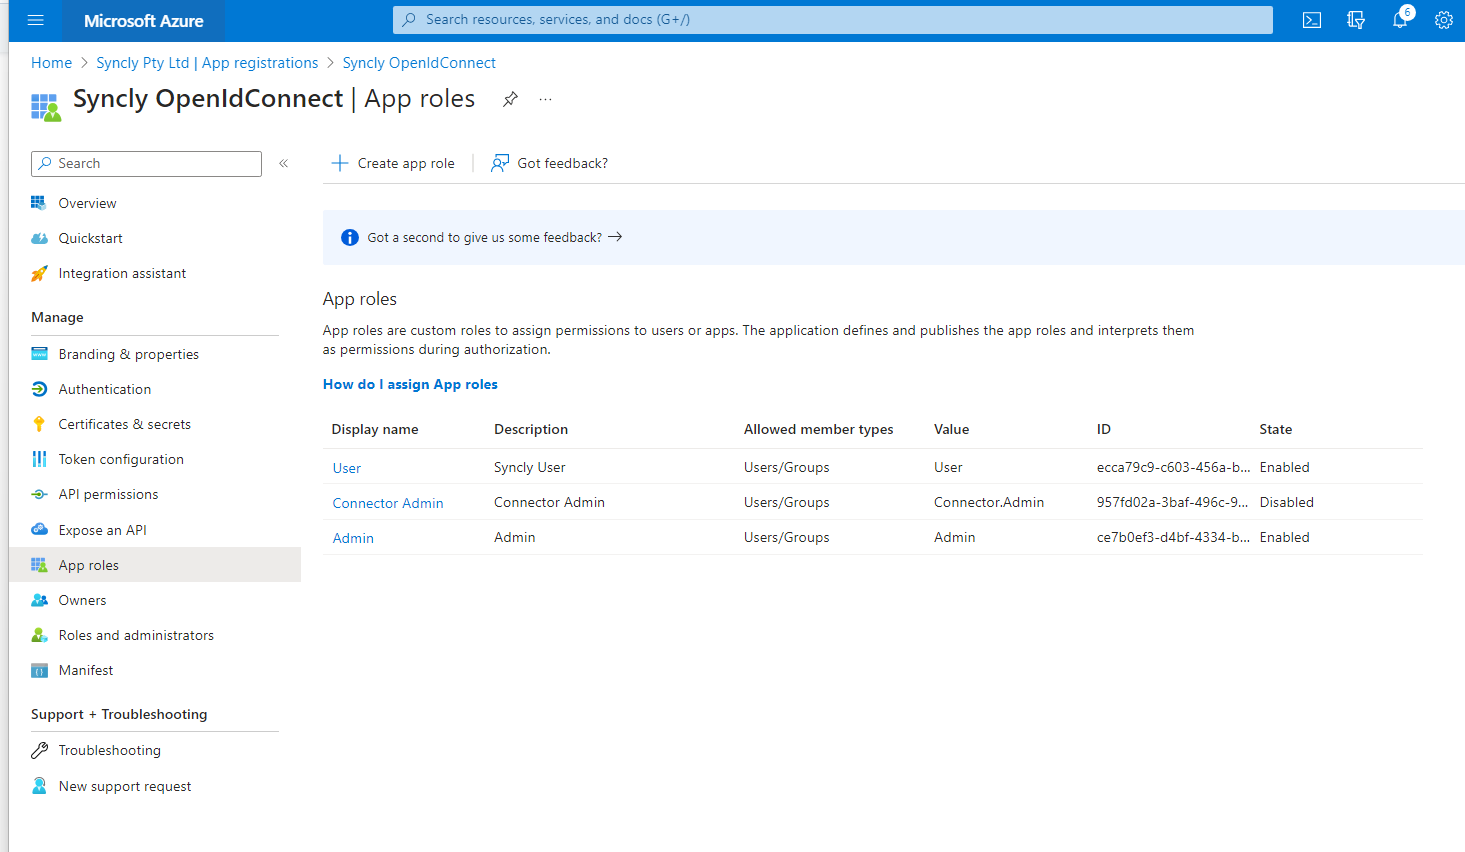
- Add app roles (User, Admin, Connector.Admin, plugin user). for more information on the types of roles please read - Syncly user roles
- Switching to 'enterprise application registrations' toggle the following items
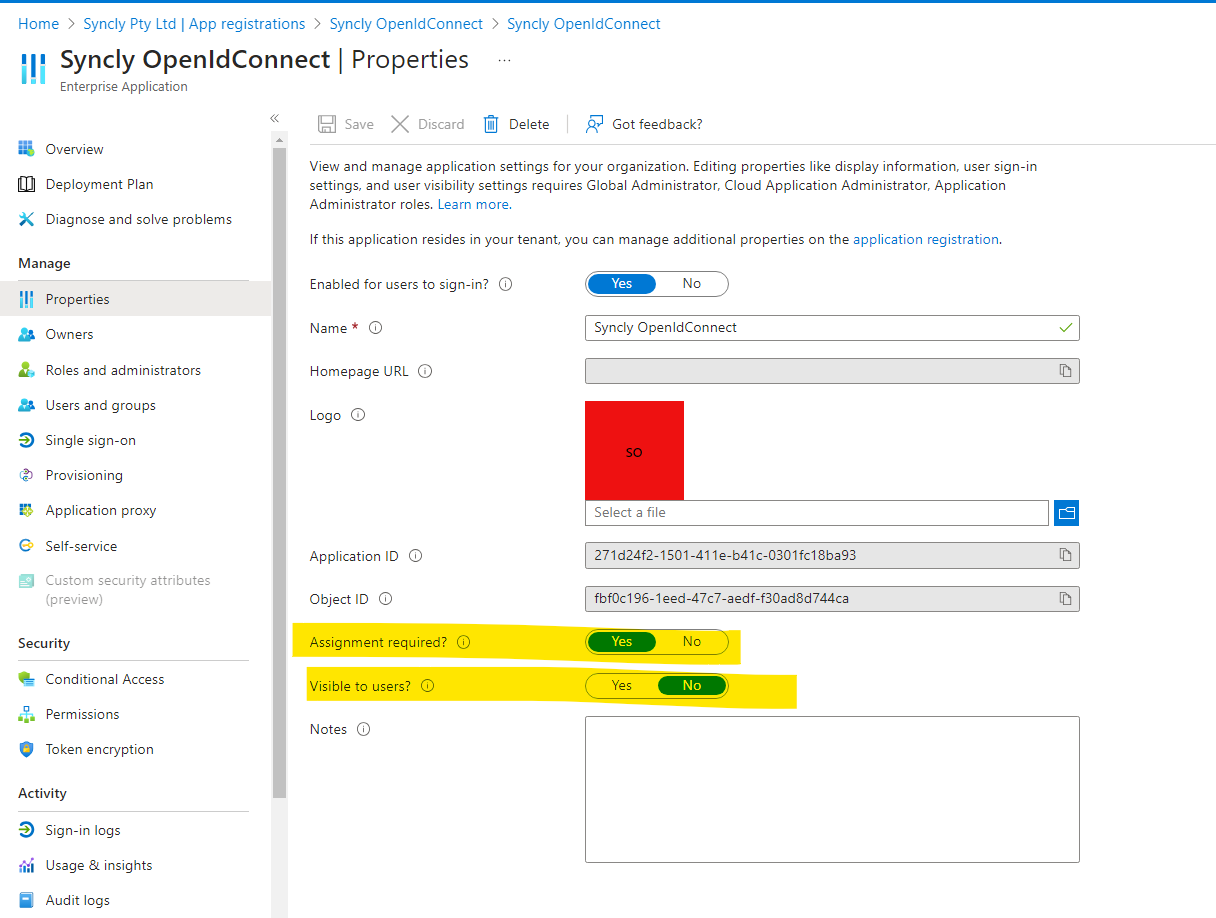
- Add users or groups into the app and associate with the roles created earlier

We then need to be provided with the following details:
1. The Application (client) ID (a guid value e.g. e593b08e-8a3b-4e19-abff-6a4a4f112e6b)
2. Your tenant id (a guid value e.g. f961ab68-a708-40d3-ade2-ca380398ae2e)
3. The secret value (Note, this is NOT the Secret ID)