
When creating Workflows you will need to add a source and target Connector by selecting from a list of authorised Connectors.
The process for adding a Connector is the same regardless of whether the Connector is being used as the source or target, so you can follow these instructions for setting up either.
Example
Create a Workflow where SharePoint serves as the source system and Teams as the target system. This allows for one-way data synchronisation from a folder within a SharePoint Site (source location) to a sub-folder within a Teams site (target location).
🆘 Please make sure that you have authorised the Connectors that you want to use before you try to create to add a Connector as a source or target system.
Learn more about how to Authorise Connectors.
1. Add a Source or Target System
- In the Workflow creator, once you have started creating a new Workflow, you will need to add a source system, and then a target system to your Workflow.

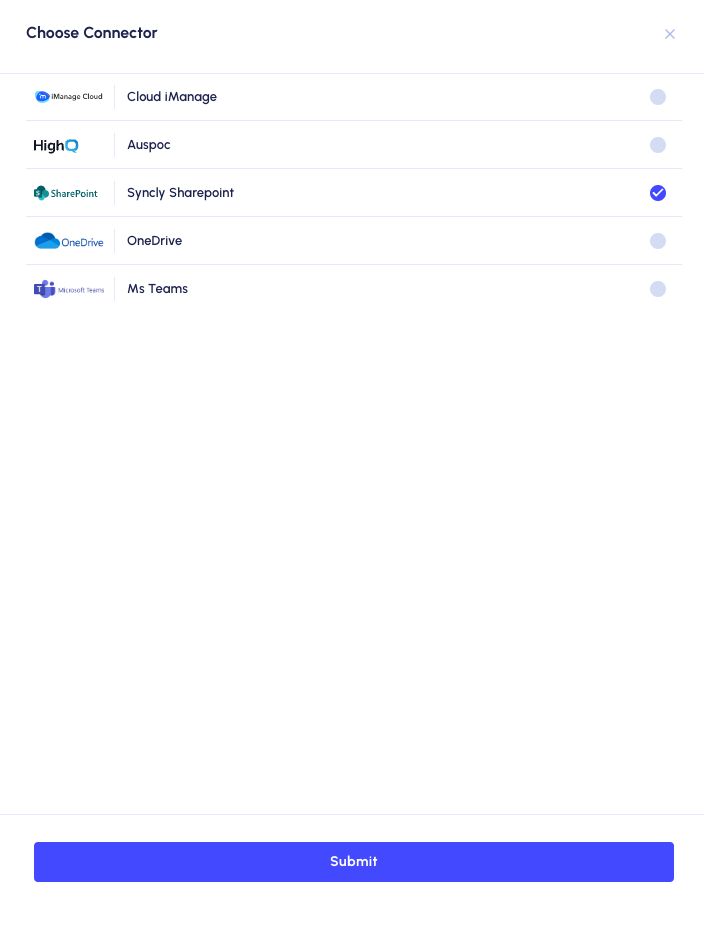
2. Add a Connector (source or target system)
- Choose your Connector: select the Connector that you want to use by clicking on the
- Submit your selection: click the “Submit” button once you have made your selection.
3. Select Connector Environment
The root location is the location where you want the data to either move from or move to.
💡 You cannot add a Environment as the root location, you must select an Environment first (if required) and then choose either a Folder (Document Library, Matter etc) or Sub-folder as the root location.
Find and expand details for the relevant environment:
- Locate Environment: you will be shown a list of the recent environment (e.g., the environments where folders that you have interacted with recently reside), but if you don’t see the environment you want, you can use the search bar to type in the name of the environment.
- Select Environment: once you have found the relevant environment, click the arrow to the left of the environment you want to select your root location from to see a list of folders within that environment.
If you are not seeing your environments, you can learn more about how to Authorise Connectors. Only libraries for authorised Connectors will be shown.
4. Select Root Location Inside Environment
Then, choose either a folder (Document Library, Workspace, Site etc) or sub-folder as the root location.
- Locate Folder: you will be shown a list of recent folders (e.g., matters, projects etc that you have used recently), but if you don’t see the folder that you want, you can use the search bar to type in the name of the folder.
- Select Root Location:
-
- Folder: once you have found the folder, you can choose to set the root location at the folder level by clicking the grey box (will go blue) or click the arrow to see a list of all the sub-folders within that folder to select the root location from.
- (Optional) Sub-folder: if you want to set the root location as a sub-folder within the folder, you can click the box next to the relevant sub-folder to select it.
Then click the “Submit” button to add your Connector and root location.

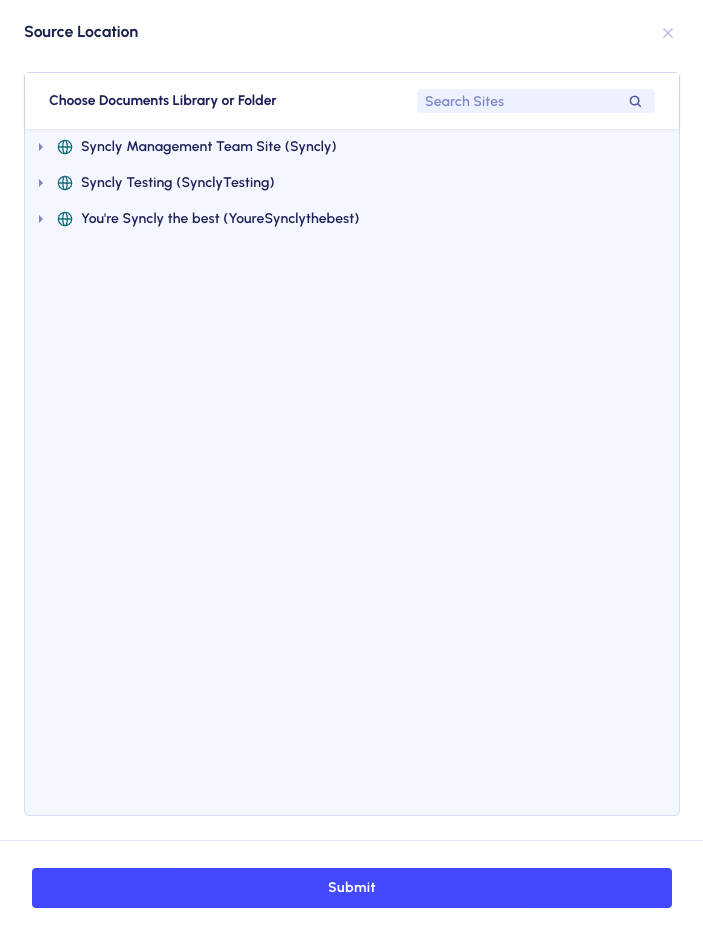
Example
Using the image above as an illustrative reference, the:
- Environment = “You’re Syncly the best!”
- Folder = “Documents”
- This is a selectable root location.
- Sub-folder = “General” and “Test 1” folders (with “Test 1 – New Folder (Renamed) folder” being another Sub-folder inside the Test 1).
- These are all selectable root locations.
You can select any location that has a grey box next to it, whichever root location you want data to move from or move to (but you can only select one (1) root location).